
Typing accuracy, key responsiveness, and the feel of precision are just some of the numerous advantages that a clean keyboard can provide. In this article we will be discussing how to keep your keyboard in top shape for your top gaming performance and will provide the necessary steps in making sure that they stay that way.
They say that prevention is better than cure, so first we will look into preventive or light cleaning for your keyboard, then move on to a deeper cleaning for a more thorough maintenance of your hardware.
Light / Preventive Cleaning
Regularly cleaning your keyboard will prevent dirt, dust, debris, and other residual dirt from building up on the deck of the keyboard. Make it a habit of cleaning your keyboard weekly or whenever you see dirt accumulating to prevent long-term keyboard problems.
- Unplug the keyboard then turn it upside down. Shake out any dirt, crumbs, or dust.
- With a handheld vacuum, remove dust from the keyboard plate. Slide it across the spaces between keys. If you don’t have a handheld vacuum, a brush with soft and long bristles will do. Make sure to be gentle while pushing the on the keys to avoid damaging the keyboard.
- Remove the stains while disinfecting by using a microfiber cloth. Dampen the cloth with alcohol and water, then wipe down the keyboard. Disposable wipes will do the job as well, just be cautious to not use any harsh cleaners, and NEVER directly spray a cleaning solution onto the keyboard.
- Using a dry cloth, wipe away the moisture from the keyboard.
In-Depth Cleaning
A thorough cleaning a few times a year ensures that the keyboard is in top condition. You can do this by cleaning the switches by removing the keys with a keycap puller, usually a mechanical keyboard comes with one, but if yours didn’t, you can easily get one as it is easily available in any computer hardware store or in any inexpensive computer tool kits.
- First, take a photo of the keyboard so you can reattach the keys properly and keep track of where the keys go after cleaning.
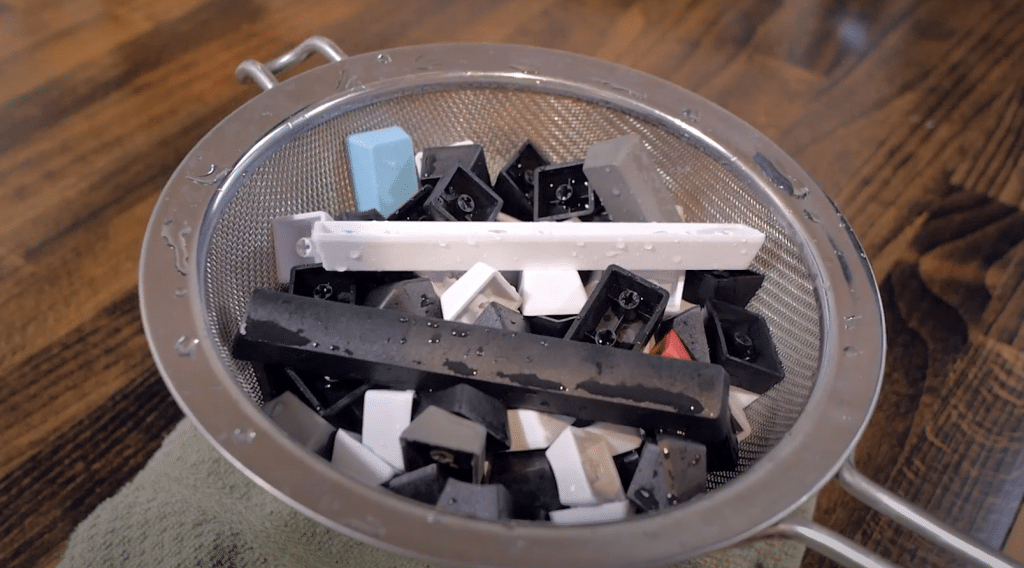
- Use a keycap puller to remove every key, then put them in a large bowl filled with warm, soapy water. Let the keys soak for several hours. (Approximately 2-3 hours.)
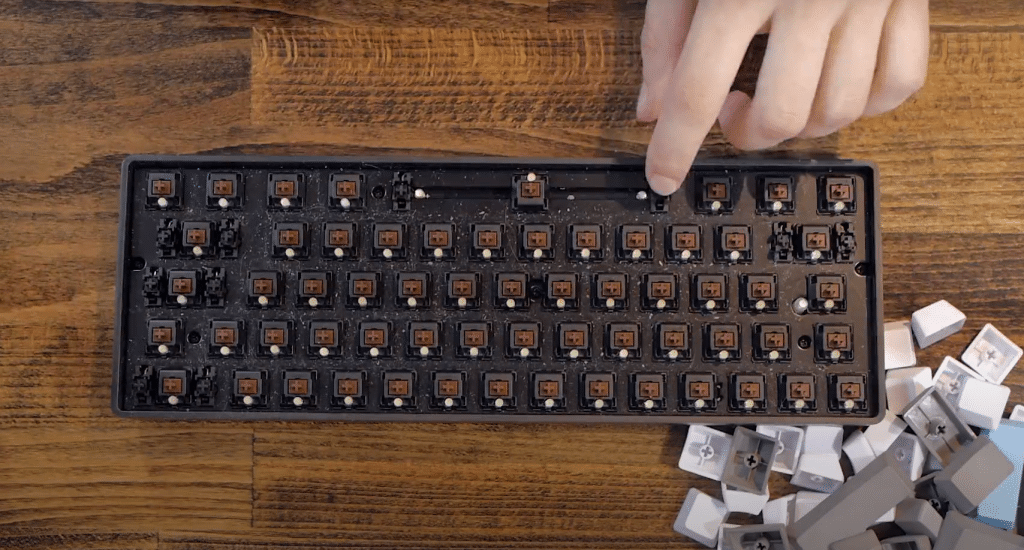
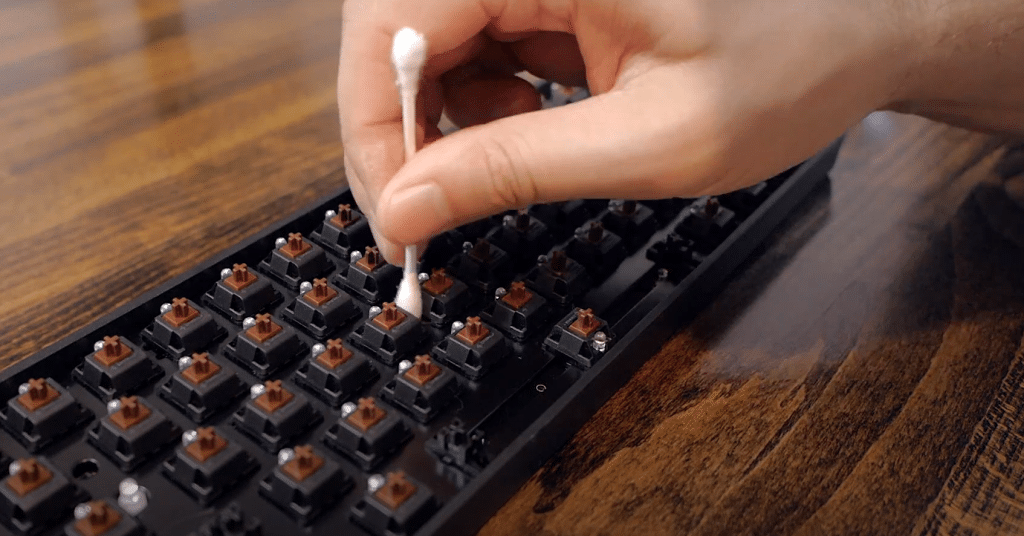
- While the keys soak, use a vacuum or a dampened microfiber cloth to remove residual dust and other debris from the keyboard deck. Use a cotton swab to remove hard-to-remove dirt around the switches.
- Wipe the keyboard dry with a fresh, dry cloth then air dry for a few minutes to make sure that no moisture remains in the switches.
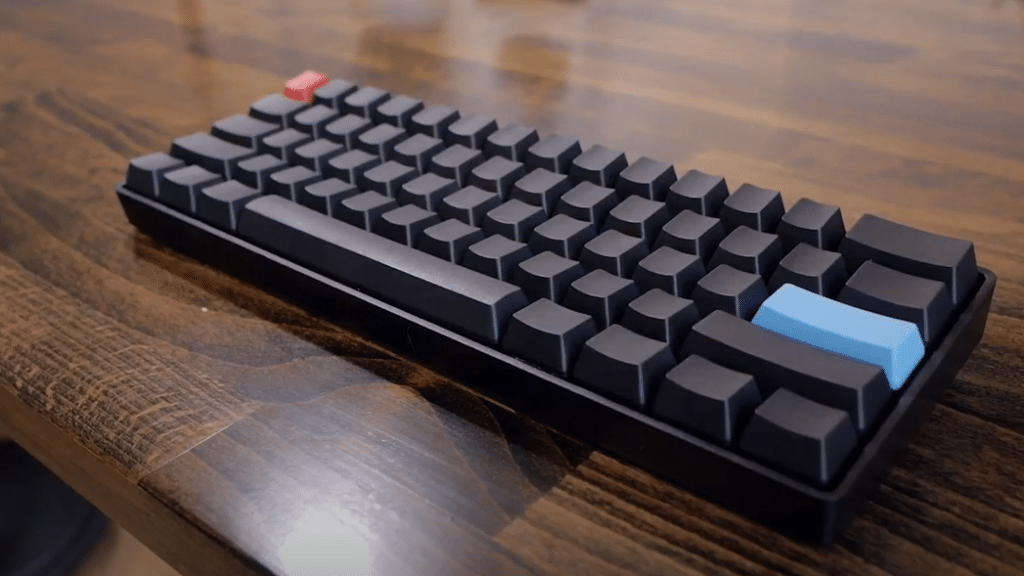
- After soaking, rinse and dry each key, then reattach it to the keyboard by pressing onto them until each one snaps into place.
Cleaning Up After a Spill
Accidentally spilling a drink onto your mechanical keyboard is a common occurrence for gamers or anyone who spends a lot of time in front of the computer. Don’t worry, it happens! First thing to do is unplug the keyboard from the computer’s USB port to prevent electrical damage, to both the keyboard and the PC.
If you only spilled water onto the keyboard, turn the keyboard over to let it drain, then use a keycap puller to remove the keys around the spill. Wipe the affected area with a cloth, and air dry the keyboard to make sure that no moisture remains.
If you spilled soda or any sugary drinks, however, it will leave a residue and make the keys sticky if left to dry. Completely remove the keys and perform an in-depth cleaning that was outlined above.
Here are videos to supplement the article to help you clean your mechanical keyboard:
Follow these instructions to keep your keyboard in top performance and provide you with the best gaming experience that your hardware has to offer!
Read more of our articles for more tips on top gaming performance and everything esports!