
OBS (Open Broadcaster Software) is a commonly used program by content creators as a streaming and recording platform. It is free, open-source and cross-platform (supported by Mac, Windows and Linux). OBS offers a wide range of features and functionalities that are incredibly useful for recording and streaming.
Through OBS, you can either record your games and then have them saved to your local drive or you can use OBS as a live streaming platform wherein your video data is sent to your chosen live-stream server.
Setting up your OBS for streaming/recording
1. Download and Install OBS
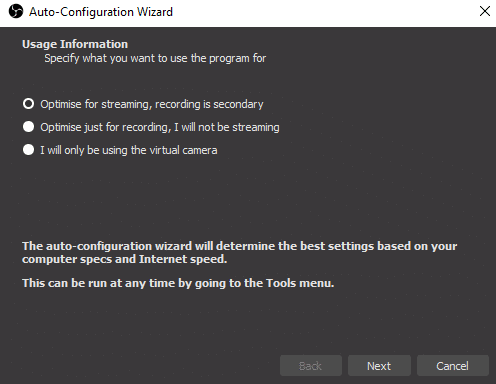
You can download OBS from http://obsproject.com/download and install according to the instructions according to your designated operating system. Once launched, an auto-configuration wizard window will appear and offer to customize your starting settings based on your system setup; it does this through automatically testing your system finding settings that are best for your PC, this includes streaming or recording, resolution, bitrate, encoder, streaming provider and many more. These settings will allow you to get started as quickly as possible without worrying about configuring your settings as everything is taken care of, however this is entirely OPTIONAL and you may press the cancel button to exit out of the auto-configuration wizard. If you change your mind you can come back to it anytime from the tools menu, or manually modify the settings yourself later.
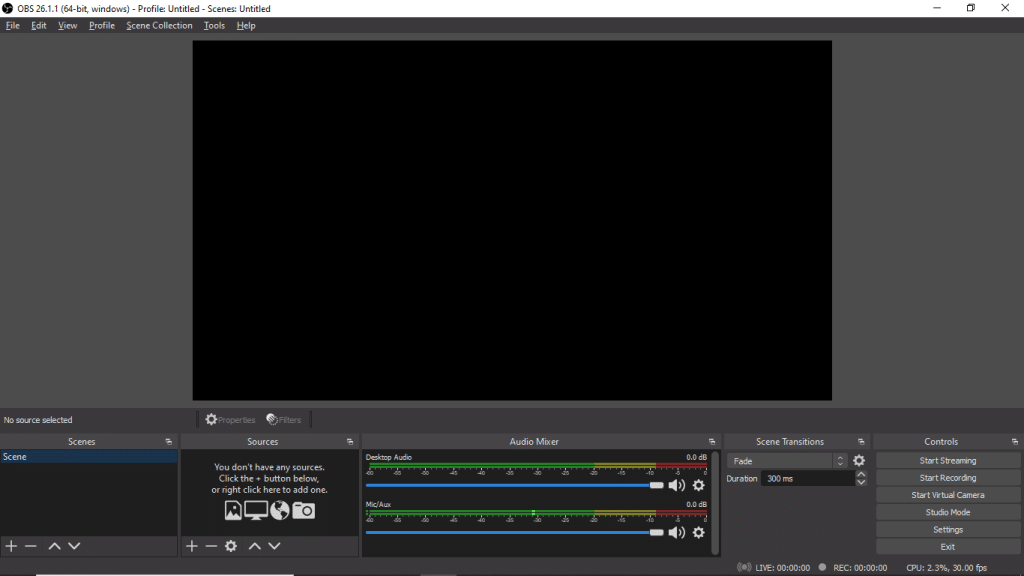
Once launched, you should see a screen that looks like this:
(NOTE: the OBS interface look may vary depending on your operating system)
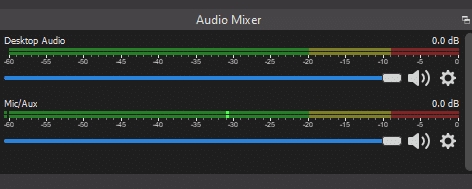
2. Audio Devices Setup
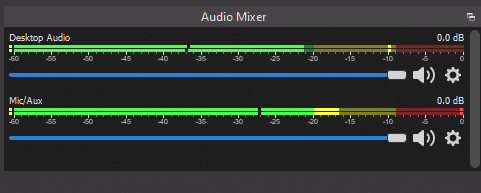
Your setup purely depends on what audio devices you plan to use, if any at all. OBS uses your system’s desktop audio device and microphone by default, you can find the Audio Mixer at the bottom center of the interface. It looks like this:
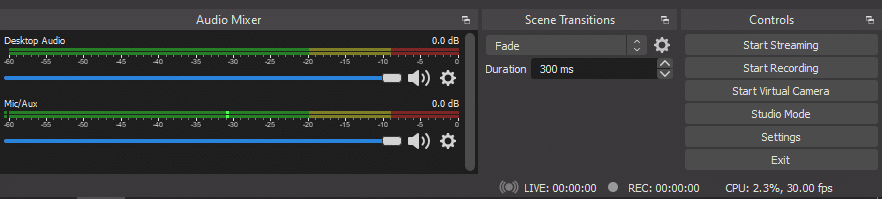
Some people prefer to just record/stream without commentary, which is totally ok. If you do plan to voiceover your recording/stream, you’ll need to adjust your settings according to your preferences. You may access your audio settings and manage your audio devices that you want to use under the Controls tab by pressing Settings; this is located at the bottom right of the interface.
Once pressed the settings window will appear, you want to select Audio from the sidebar tab; it should look like this:
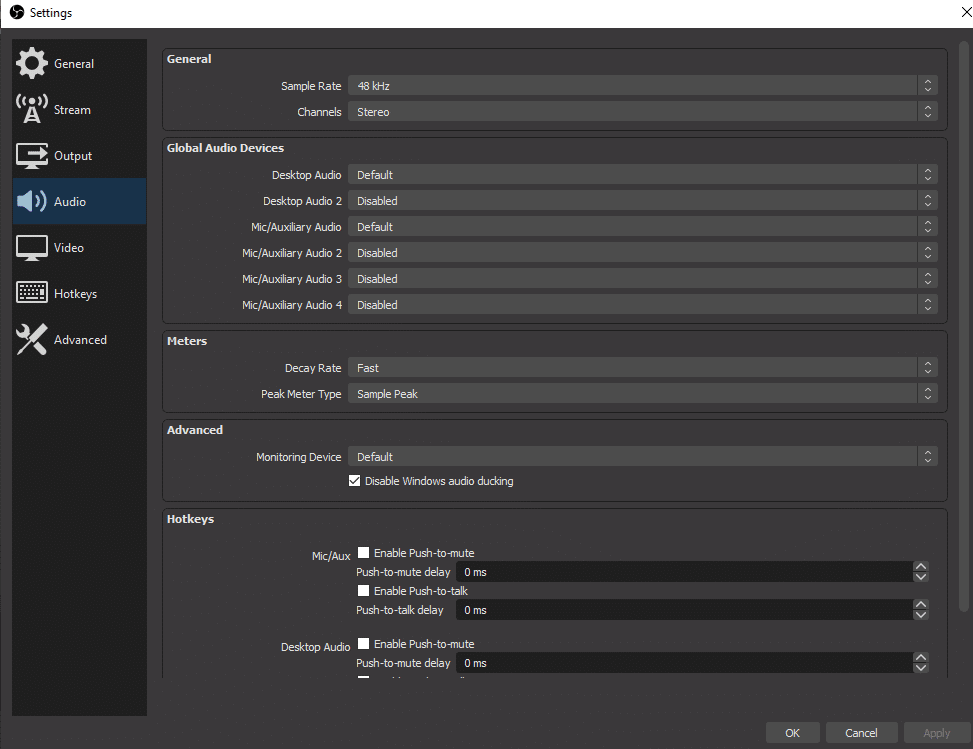
From here, you may customize and select your chosen devices and settings to your liking, once finished don’t forget to press apply changes. To verify that your chosen preferences are working you may look and test the volume meters in the Audio Mixer section, for the sake of this guide we have stuck to using the system’s desktop audio device and microphone by default. To conduct the test, make sure that both of the volume meters light up and are moving when actively testing your chosen audio and mic.
If they aren’t moving, or you suspect the wrong device has been selected you may go back to the audio settings and adjust accordingly. If everything is working to your liking, then your audio is good to go!
3. Screen Recording Setup
Now that your Audio is all set up, you are ready to adjust your screen recording setup! OBS uses Scenes and Sources, these two features work together to neatly manage your video, audio, and other production assets. Some examples of Sources are static images, videos, webcam or game feeds. You can change the settings to have OBS record specific windows or entire screens depending on how you plan to utilize OBS. By default, there is already a scene added in which you can find in the bottom left corner of the interface
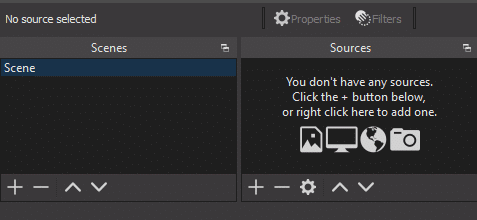
The next step is adding a source inside the scene. With the default scene selected (automatically highlighted) click the + button at the bottom of the panel labelled Sources, and a menu will appear on the screen giving you multiple options. It should look like this.

Regardless of the option that you choose from the source menu, the window will always appear the same, with only the default title being the difference. You may choose to only select certain screens, which can be further customized. For the purpose of this quick guide, the option “Display Capture” was chosen, which means the entire screen’s display will be actively shown.
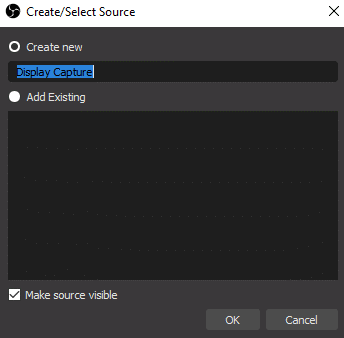
From here you can edit the default source name (I edited mine to Display Capture 1.0, but you can rename it to anything you like), or add an existing source. You want to make sure before proceeding that the little box at the bottom has a check mark next to “Make source visible”. After doing so, another window will appear looking like this:
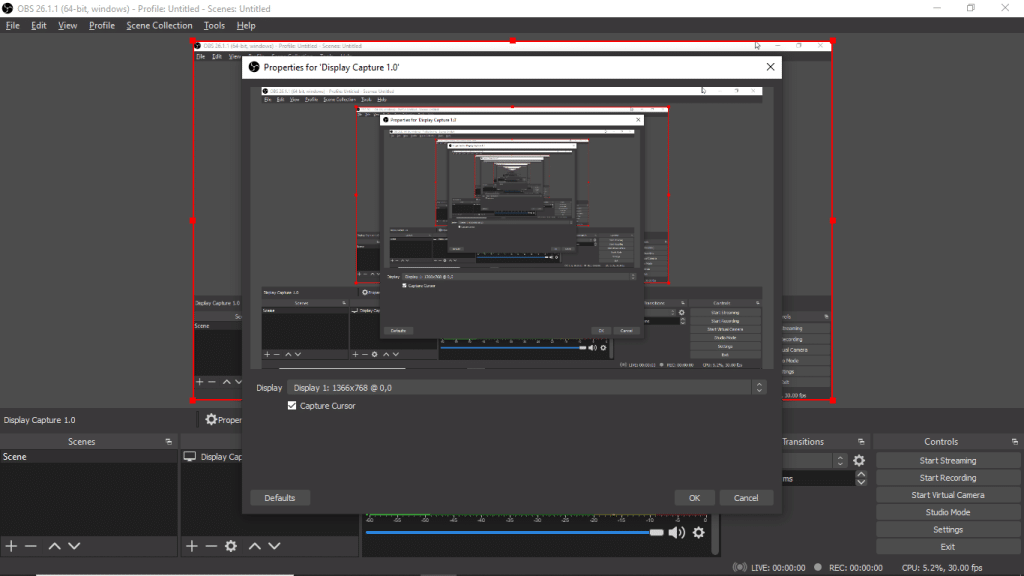
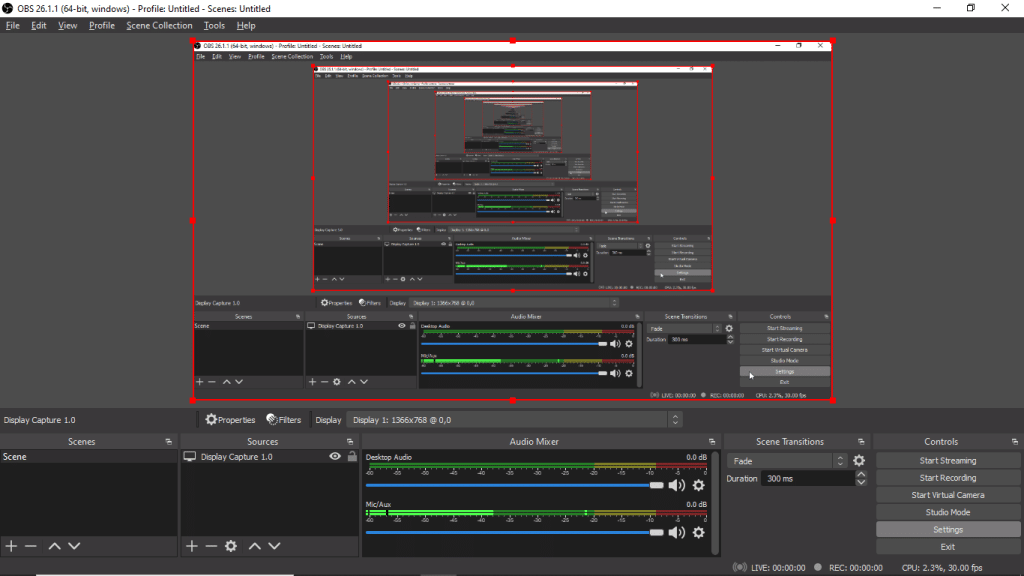
In this window you will have the option to have your cursor shown while you record, to turn this feature off you may deselect the check mark next to “Capture Cursor”. Once you are happy with your settings, what you want to do next is press the OK button, the properties window will close and your screen should look like this:
From here, press on Settings which can be found in the bottom right of the interface under the Controls tab. Once pressed the settings window will appear, you want to select Output from the sidebar tab; it should look like this:

The Recording Path field is the destination of where your recorded video will be saved on your computer. You may edit where you want the recording to be saved by pressing browse and selecting your wanted destination. Make sure to apply your settings before leaving the window. Once done with this you are ready to record!
4. Streaming setup
Now that you understand the basics of recording and locally saving videos through OBS what about streaming? Well, luckily now that you are well-versed with the screen recording setup, you are almost there. Your streaming setup and further settings depend on what platform you will be livestreaming on, so unfortunately we can’t go into detail for all the different streaming platforms. You will need to coordinate with your chosen platform for your specific setup, instead this will teach you the basics on how to start setting up for your stream. To start off, you will want to revisit Settings under Controls, and select Streaming.
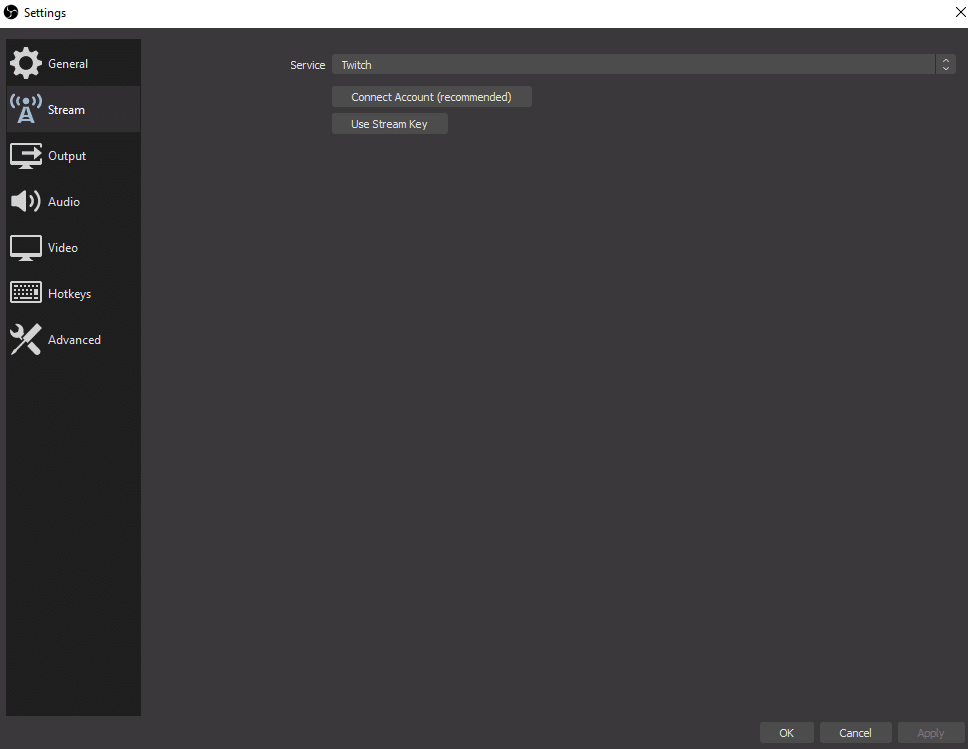
Once opened, the default streaming platform that will be selected is Twitch. If this is your streaming platform you can then connect your account or use a live stream key and coordinate both OBS and your Twitch together. If you use another streaming platform, press on the two arrows at the side of the Service selection and a dropdown menu should appear that looks like this:
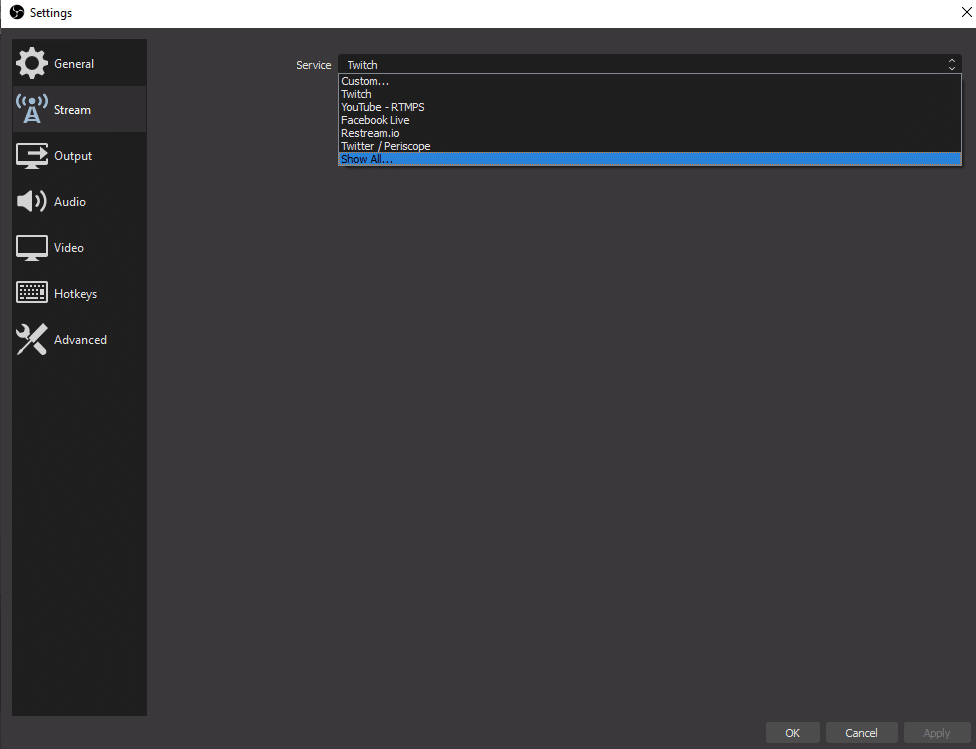
The most common streaming platforms will be shown in the options, if you do not see your selected streaming platform press Show All… for the complete list.
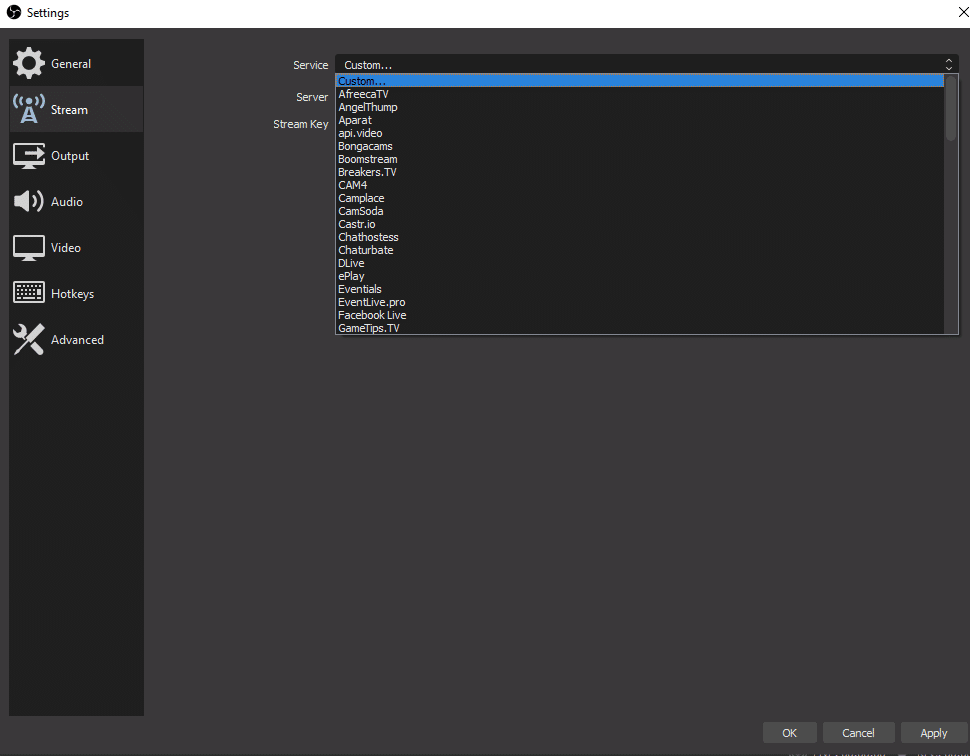
If you still cannot find your selected streaming platform within the options provided, there is a Custom… option that should support your streaming platform.
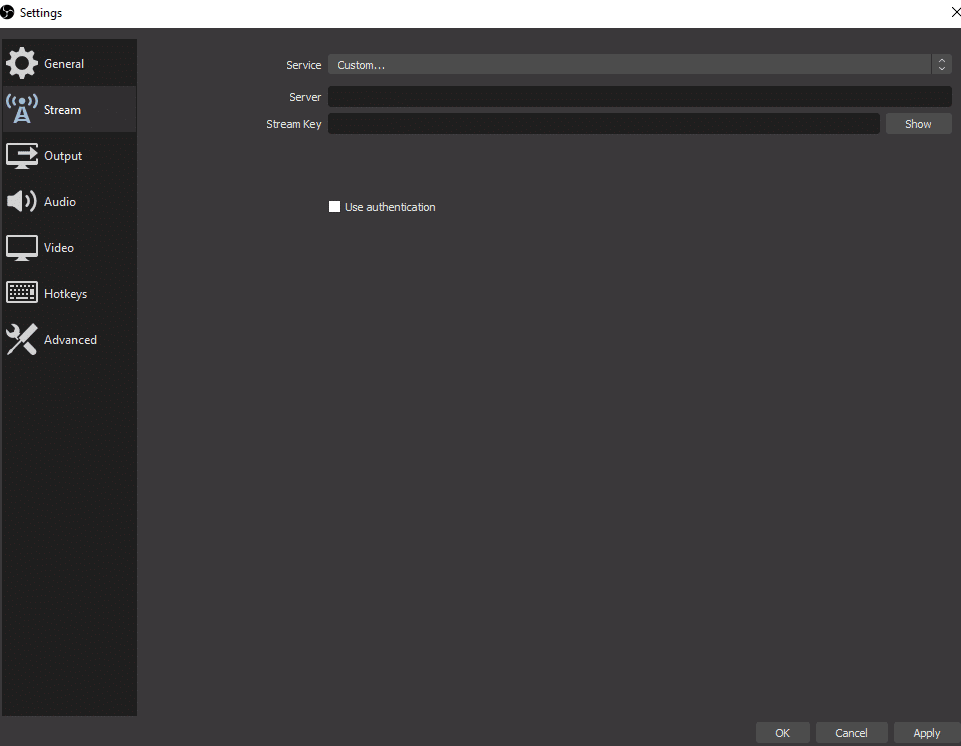
From here you can manually enter your stream server and stream key, and voila! You have the basics ready for you to stream. 🙂
Note: OBS does not automatically record your streams, so if you want to record and save a copy of your stream you will need to click on Start Recording after you start streaming by pressing Start Streaming.
Where does OBS save recordings and how to access them
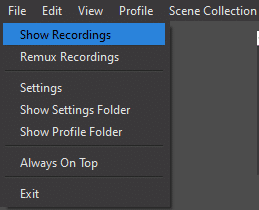
So, to answer the question: Where does OBS save recordings and how to access them, depending on what version of OBS you are using, there will be a default folder that it gets saved to. To locate and access the default folder directly on your pc, at the top left hand corner of your screen click on File. A drop down menu should appear that will then give you the option to Show Recordings. Once pressed, the default folder where your recordings can be found will open up on your screen.
As briefly discussed in this quick guide on OBS, you may change the default location of where your recordings are saved. To do this, press on Settings which can be found in the bottom right of the interface under the Controls tab. Once pressed the settings window will appear, next select Output from the sidebar tab.
The Recording Path field is the destination of where your recorded video will be saved on your pc by default. You can edit the location of where your recordings will be saved by pressing browse and selecting your wanted destination on your pc. Make sure to apply your settings before leaving the window. To check if your settings are saved, you may click on File then Show Recordings as explained earlier to make sure your correct folder/destination has been selected.
Keep in mind that these are all standard settings, and we encourage you to freely customize your settings according to your liking. Especially for streaming, every platform has their own unique custom capabilities that you have to adjust according to the content that you will be streaming or recording. OBS only seem daunting at first because of its numerous functions and customizability, but it’s really not that hard to use. You can follow this guide to the T and you’ll be just fine! Good luck streaming!
Are you looking into streaming or organizing a tournament? Check out our guide on setting up Nightbot!